Right-click and open in a new tab to enlarge and print.
Instructions
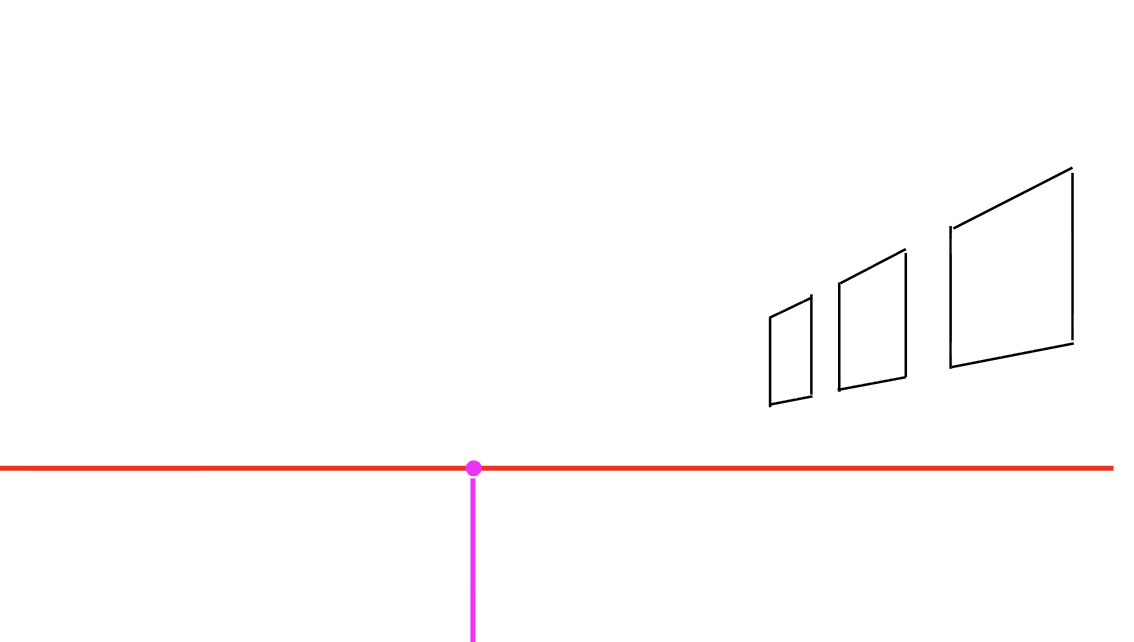
Week 6:
How to construct same sized objects with gaps in between, and the objects and gaps are different sizes:
Define the length of the set of paintings.This includes the 3 paintings and the gaps in between.
Use the X method to find the center of the area.
Draw a vertical line to define the center.
Erase the construction lines.
Divide each section in half using the X method.
Draw vertical lines where the center is, in each half.
Erase the construction lines.
Use the X method to find the center of each section.
The painting to gap ratio is 2:1. The gap will be half a section.The red vertical lines are the edges of the second painting.
Clean up your drawing and you’re done!
Week 5:
How to construct the objects that are the same size and distorted by perspective.
Starting at the bottom left of the body of the piano, draw the depth of the table leg closest to you. This is undistorted.Make sure the bottom of the table leg lines up with the bottom of the piano. This will express that they’re both on the ground. If they do not line up, you’re saying part of the piano is higher and one part is lower.
Connect each 90 degree corner to the Vanishing Point. This will help you draw the distorted facets of the leg closest to you and will guarantee the leg furthest from you is accurately distorted by perspective, while being the same proportions as the front leg.
Draw the width of the leg closest to you. This facet is distorted and will be drawn based on the perspective lines.
Finish the rest of the table leg closest to you by using vertical and horizontal lines to connect the ends of the perspective lines. The green, horizontal dashed line is the corner of the leg that we can’t see. This will eventually be erased.
For the leg furthest from us, starting at the bottom left corner of the piano body, draw the undistorted surface of the leg. This is actually a surface you can’t see from this angle, but we need to draw it to construct the rest of the leg.The process is going to be slightly different than the previous leg, as you’ll now be building towards you, whereas previously, you were building away from you.
Draw the width of the leg along the same perspective lines as the front leg (the red dotted lines).The measurement is a guesstimation as calculating it would take a very long time (the easiest method I know of would be utilizing the X method).To make it look convincing, make sure the width is shorter than the leg closest to you, as the further leg needs to be much more foreshortened, since it’s further away.
Draw the width of the leg along the same perspective lines as the front leg (the red dotted lines).The measurement is a guestimation as calculating it would take a very long time (the easiest method I know of would be utilizing the X method).To make it look convincing, make sure the width is shorter, as this leg needs to be much more foreshortened, since it’s further away.
Clean up the drawing and you’re done!
Week 4:
Continue adding furniture into your one-point perspective interior. Experiment with making objects lean, equally spacing objects, and how to manipulate the X-method to create new shapes (like the diamonds we made on the floor).
Week 3:
Finish your one-point perspective drawing of a street. Keep in mind your eye level and the vanishing point.
Remember, in one-point perspective, there is always an undistorted side (made with only vertical and horizontal lines), and it's the side that is perpendicular to your direction of gaze. Surfaces that are parallel to your direction of gaze are distorted, and will be constructed with radiating lines (connected to the vanishing point).
Week 2:
Practice finding your eye level in real life, through the methods we covered in class.
Four ways to find your eye level (in photos and/or real life):
Raise a glass of water until the surface of the water appears to be a straight, horizontal line
Find where 90 degree corners or curved edges appear as a straight horizontal line
In a photo, use a horizontal ruler to find that horizontal, straight line
Extend distorted edges until they converge at the same point(s)
The horizon of the ocean
Week 1:
Finish your perspective sketches without a ruler on your own. Create buildings, sidewalks, and other familiar objects in accurate one and two point perspective.
Challenge:
Try to make some shapes look hollow.
Artist Examples
Want a closer look? Right-click and open in a new tab to view.